Decide which side of your object will be the top, right, left and bottom view.
Step 2
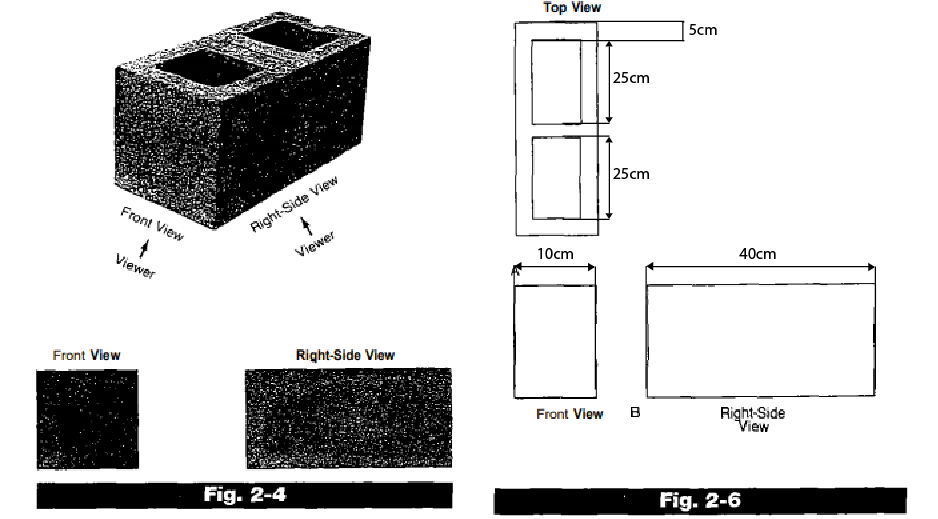
Draw your front view and note down the dimensions you might need like widths, lengths or radius. (Remember, it doesn’t need to be pretty. It just needs to be clear enough for you to understand how to replicate this object in a modeling program later)
Step 3
Add the right view and then a top view just as you did with the last step.
If needed add other views of your project.
Make the 3D Model
Step 1
Now, let’s use TinkerCAD or Onshape to make the 3D model from your blueprint so we can print it and bring it into the physical world!
Decide which side of your object will be the top, right, left and bottom view.
Step 2
Draw your front view and note down the dimensions you might need like widths, lengths or radius. (Remember, it doesn’t need to be pretty. It just needs to be clear enough for you to understand how to replicate this object in a modeling program later)
Step 3
Add the right view and then a top view just as you did with the last step.
If needed add other views of your project.
Make the 3D Model
Step 1
Now, let’s use TinkerCAD or Onshape to make the 3D model from your blueprint so we can print it and bring it into the physical world!
What gave you trouble today and how did you overcome it?
Please Note
Your safety is your own responsibility, including proper use of equipment and safety gear, and determining whether you have adequate skill and experience. Power tools, electricity, and other resources used for these projects are dangerous, unless used properly and with adequate precautions, including safety gear and adult supervision. Some illustrative photos do not depict safety precautions or equipment, in order to show the project steps more clearly. Use of the instructions and suggestions found in Maker Camp is at your own risk. Make: Community disclaims all responsibility for any resulting damage, injury, or expense.