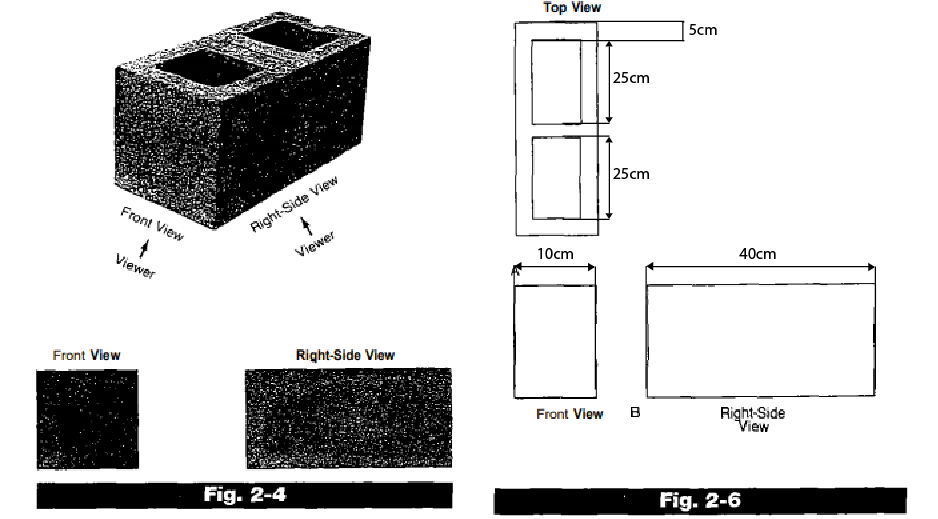
Decide which side of your object will be the top, right, left and bottom view.
Step 2
Draw your front view and note down the dimensions you might need like widths, lengths or radius. (Remember, it doesn’t need to be pretty. It just needs to be clear enough for you to understand how to replicate this object in a modeling program later)
Step 3
Add the right view and then a top view just as you did with the last step.
If needed add other views of your project.
Make the 3D Model
Step 1
Now, let’s use TinkerCAD or Onshape to make the 3D model from your blueprint so we can print it and bring it into the physical world!
Our websites use cookies to improve your browsing experience. You can manage your preferences below. Some cookies are essential for basic site functionality and cannot be disabled.
Analytics cookies
We use Google Analytics and ActiveCampaign site tracking to understand how visitors use our sites and to personalize communications with existing subscribers. No personal data is shared with third parties for advertising purposes. Enabled by default — you can opt out by switching off the toggle above.
Advertising & tracking cookies
Used by Facebook, LinkedIn, X, and others to enable targeted advertising features. These will not be activated without your explicit consent.